Tripod shooting at the Great Salt Lake wetlands
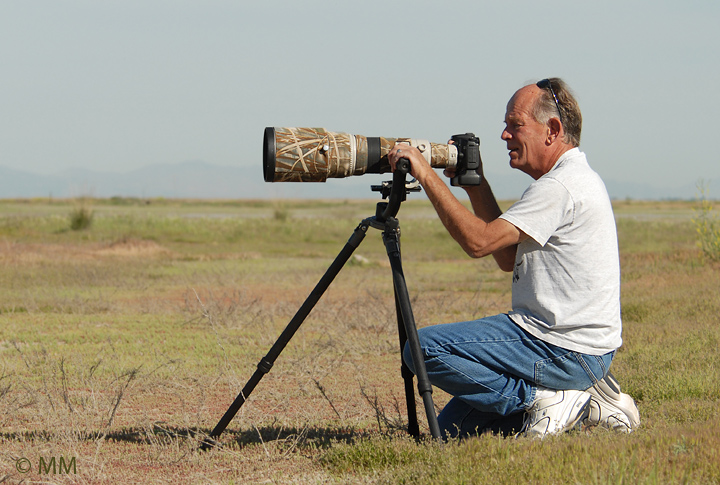
Tripod shooting is certainly not my typical method of photographing birds. My best estimate is that less than 10% of my bird photography is from a tripod. When circumstances demand it however there’s simply no substitute for a sturdy but relatively lightweight tripod and a gimbal style head, especially for shooting birds in flight with my large, heavy lens. Some folks are able to hand hold this lens for hours on end and get spectacular results. I can’t, partly due to back problems.
Lens Cart
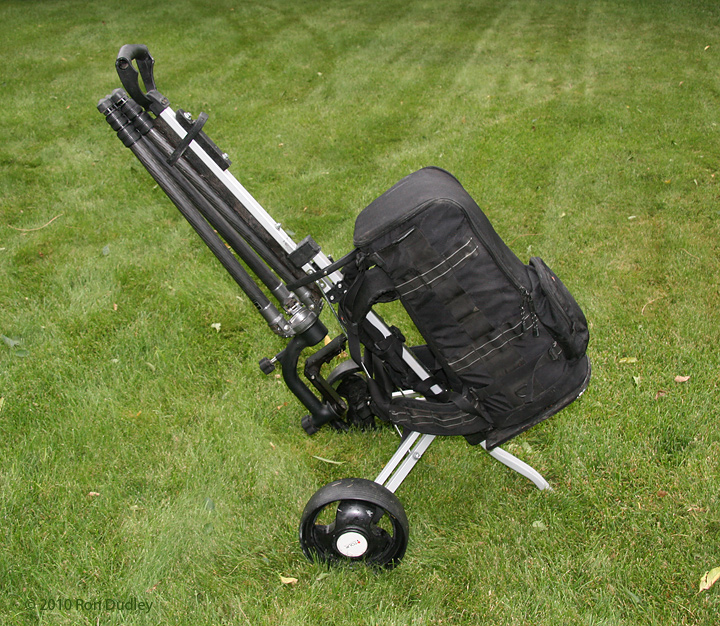
Because of back problems I can’t carry my heavy lens, camera body, tripod and associated gear further than about a mile. To help solve that problem I came up with this lens cart. It’s a pull-type golf cart that I modified to be able to carry my heavy 500mm lens with attached body in the pack and my tripod with Wimberly head attaches under the “tongue” of the cart. There’s room in the pack for other assorted gear and I often hang a water bottle and extra body with my 100-400mm zoom to the pack. It’s very light and pulls effortlessly. The wheels are large enough to handle fairly rough terrain. The main limitation of this outfit is that it can’t negotiate tall vegetation or narrow paths between trees. Without this cart some of my favorite birding spots would be unavailable to me.
My typical method of photographing birds
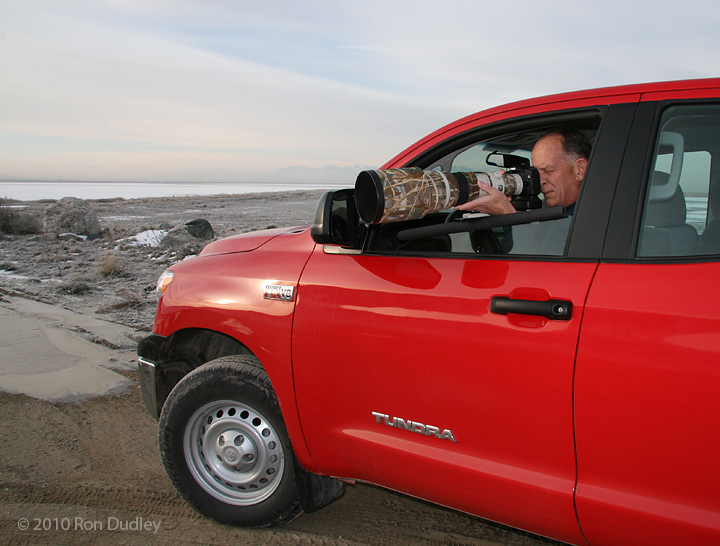
This is how I do most of my shooting – from my truck. A vehicle makes a wonderful mobile blind for photographing birds. The advantages are many – most birds are much less afraid of a vehicle (even an incredibly red one like mine) than they are of someone on foot, you can cover significantly more territory looking for birds in a vehicle than you can walking in a given amount of time, you don’t have to wait for the birds to approach you – instead, you can approach them, and you can keep relatively warm even on the coldest winter day. This method works very well for me because much of my shooting is done in wetland areas interspersed with dirt or gravel roads. However, this method does have some limitations – roads must go where you want to photograph and the angles and directions you can point your lens are limited since you’re shooting through the window. Believe me, I’ve done some very creative (crazy) driving to get access to a bird through my window with light coming from the right direction.
Using a “noodle” instead of a bean bag
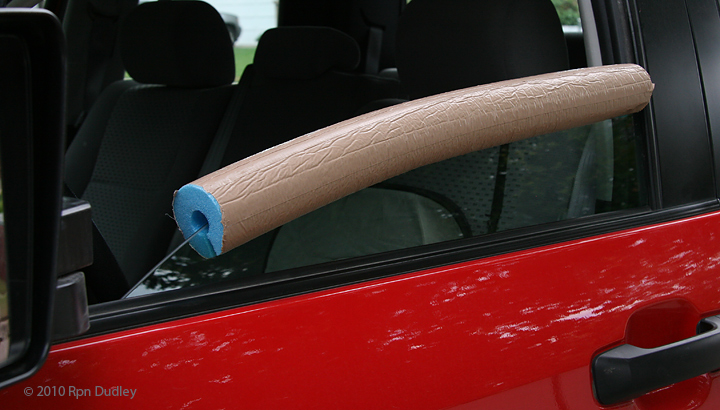
I’ve never liked bean bags for shooting from vehicle windows for a variety of reasons with the primary reason being problems with flight shots. In my experience, when trying to follow a bird flying horizontally with the lens resting on a bean bag, the large surface area of interaction between lens and bean bag causes too much drag and jumpiness – resulting in a high percentage of missed or blurry images. One thing I tried, and liked, was “pipe-wrap” – that tubular foam insulation for water pipes. I found it worked fairly well but didn’t last long – it broke down from the weight of the lens and would often blow off the window even at slow speeds. My good friend Mia suggested I try a Noodle – those tube-shaped foam swimming pool toys kids use to beat each other up. When cut to length, slit lengthwise to fit over the window and covered with colored duct tape to hide the neon colors and prevent slight squeaking they’re absolutely wonderful as a window shooting platform for large lenses. They’re cheap, very durable, light and easy to take on and off the window, they fit tightly over the window so they don’t blow off and even conform to the windows curve and can be left in place when driving with the window mostly up. Best of all, the action is smooth when following a bird in flight. They come in different diameters but I prefer 2 1/2″. I’m never without my noodle!
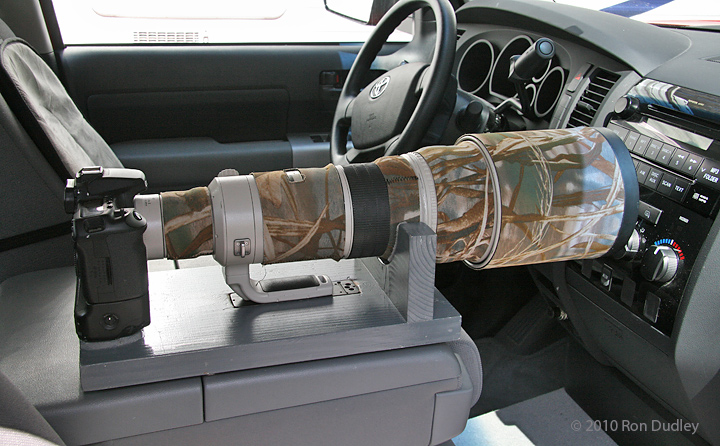
Lens caddy mounted to my pickup console
One of the problems with using a big, heavy and very expensive lens when you’re driving on rough dirt roads is how to secure it safely and still have it available for instant use. When I first started shooting birds with a smaller lens it wasn’t at all unusual for the camera and lens to go crashing to the floor when racing around bumpy dirt roads trying to anticipate where a harrier or eagle would go next and I certainly didn’t want that to happen with the 500mm. So I built the “lens caddy”. It fits securely into the seat console when it’s down but simply lifts out when I’m not shooting. The camera and lens are held securely at three points – under the camera, under the midpoint (with hood) of the lens and at the lens plate. Camera and lens are held very securely (I’ve never had them come out even over very rough roads) but when I want to shoot they simply lift out – there’s nothing to detach. There’s no wear points on either camera or lens because I have felt pads at all contact points (you can see the edge of one of them where the caddy touches the lens). I’ve been using the caddy for three years now and couldn’t be happier with it.
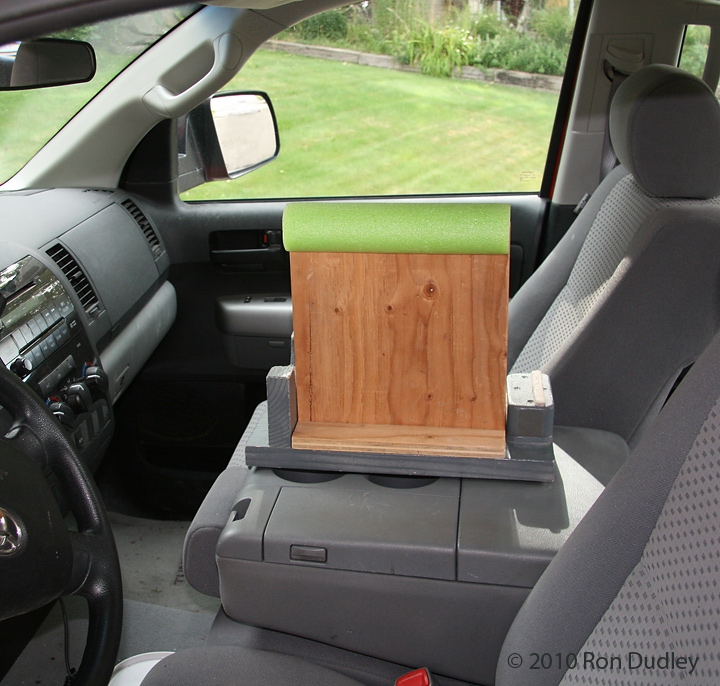
Lens prop mounted on top of lens caddy
One of my biggest frustrations when shooting from the pickup happens when I see a great bird, up close and in good light, on the right (wrong) side of the pickup. If I get out of the vehicle they invariably fly off, if I take the time to turn the pickup around they will be gone or spooked by my turning and I simply can’t hold that huge lens steady with my body twisted to the right to shoot out the window. Mia to the rescue again! She suggested that I build some kind of prop that would fit into the lens caddy and support my lens while shooting out the right window. I did just that. It has a projection on the bottom that fits securely into the slot that normally holds the lens plate of the 500mm. It’s cut to just the right height for me to shoot out the window and there’s a Noodle on top. I haven’t painted it yet – probably won’t, and I also haven’t covered the Noodle with tape to hide the flourescent green but it works great when I need it.
So, that’s how I photograph birds. I realize that everyone’s situation is different and what works for me might not work for many others. I do hope that some of these ideas may be of some help to at least a few other bird photographers out there.
Ron


This is amazing… I think I will copy your procedure in future 🙂 if you don’t mind…
I’m new to photography (< 1 year, retired) and recently discovered your blog/website and have found it invaluable. I appreciate very much your sharing what you've learned over the years. Already made a 'lens caddy' for my 7D & 500mm f/4 II lens.
Again thanks
GAP
Beautiful ideas, and here’s one photographer who’s very grateful you’re willing to share them! Thanks much, Ron!